Enable e-Invoice for Company
As you get started, you will need to enable e-Invoicing for a Company and set a date for the e-Invoicing to go into effect.
It is recommended to take a backup of your data before you enable e-Invoicing for your company. Click here to learn how to take backup of your data.
- Press F11 > e-Invoicing applicable: Yes.
If you do not see this option, set Enable Value added Tax (VAT) to Yes and ensure all VAT-related details are filled in appropriately.- e-Invoicing applicable from: Provide the date on which the e-Invoicing will become effective.

- Print QRCode for B2B e-Invoice: Yes, in case you want to print QR Code in e-Invoice issued to other companies.

- Select e-Invoice Date Print Format: Yes, in case you want to specify a format for printing date on e-invoice.

- dd-mm-yyyy: To print dates like 15-12-2021.
- mm-dd-yyyy: To print dates like 12-15-2021.
- yyyy-mm-dd: To print dates like 2021-12-15.
- Location of e-Invoice archives: Specify the path/location where you want to save the e-Invoice in XML and PDF format.

- e-Invoicing applicable from: Provide the date on which the e-Invoicing will become effective.
- Press Y to accept the screen. As always, you can press Ctrl+A to save.
Note: According to the ZATCA's e-Invoice requirements: - The Company must be security enabled. In case your company is not security enabled, it will prompt you to provide a username and password. Click here to know how to enable security for Company. - In the Company Alteration screen, the Disallow opening in Educational Mode field will be set to Yes to prevent any changes to e-Invoice transactions even in the Educational mode.
Enable e-Invoice for Voucher Type
To record transactions for printing e-Invoice for the party, you need to enable e-Invoice for Sales voucher type. Similarly, you can also enable e-Invoice feature for Credit Note and Debit Note voucher types.
- Press Alt+G (Go To) > Alter Master > Voucher Type > type Sales > press Enter.
Alternatively, Gateway of Tally > Alter > Voucher Type > type or select Sales > press Enter. - In the Voucher Type Alteration screen for Sales, set Allow e-Invoicing to Yes.
Upon setting this option to Yes, the following options will be automatically set to:- Method of voucher numbering: Automatic (Manual Override).
- Prevent duplicates: Yes.
You cannot modify these options.
- Press Y to accept the screen. As always, you can press Ctrl+A to save.
Generate e-Invoice for KSA
Generate an e-Invoice for KSA by recording a Sales/Credit Note/Debit Note voucher. But before you do that, make sure your company has covered the prerequisites and has performed a one-time setup for enabling e-Invoice. e-Invoices can be printed in a bilingual format based on your needs.
- Press Alt+G (Go To) > Create Voucher > press F8 (Sales).
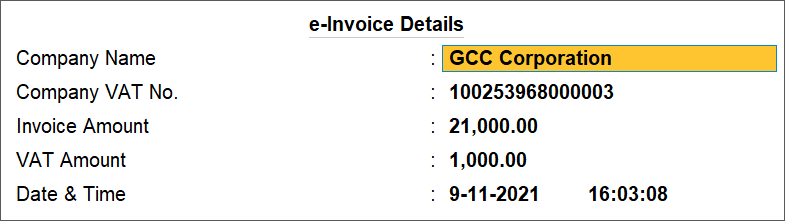
Alternatively, Gateway of Tally > Vouchers > press F8 (Sales). - On the Accounting Voucher Creation screen, set Show e-Invoice details to Yes to verify the details related to e-Invoice.
If you do not see this option on the voucher screen, press F2 (Date) to change the Voucher Date, as per the e-Invoice applicability date.
The fields in the e-Invoice Details screen cannot be modified. You can only verify them before saving the voucher.
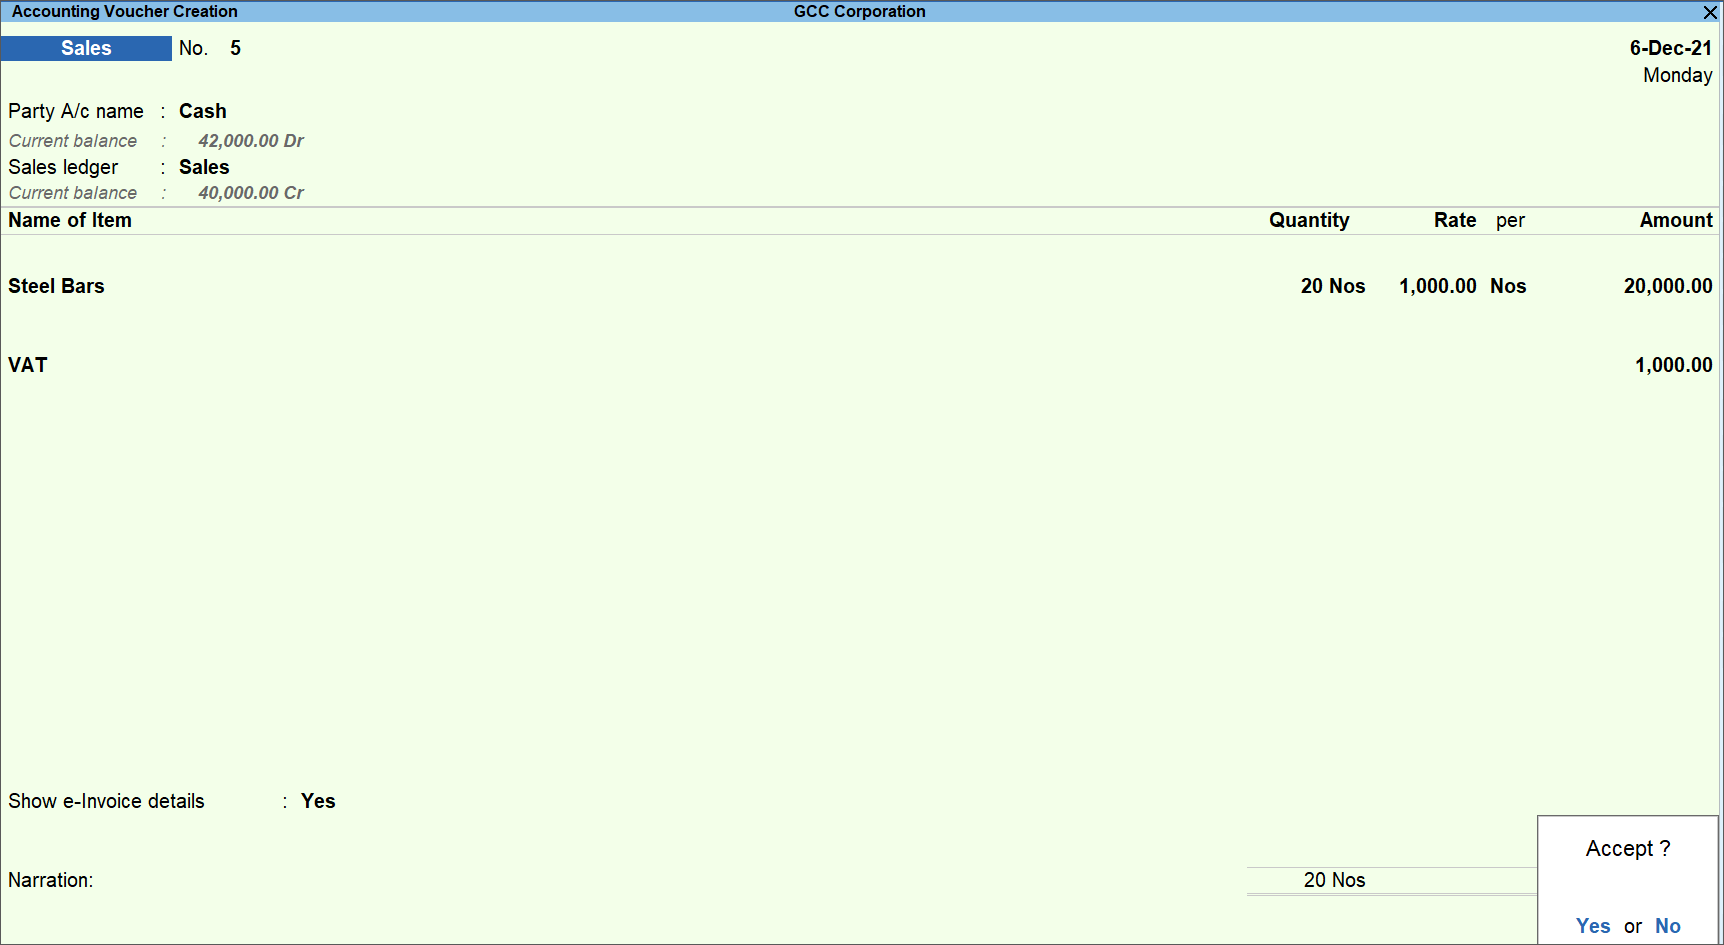
The Sales voucher appears as shown below:
- Press Y to accept the screen. As always, you can press Ctrl+A to save.
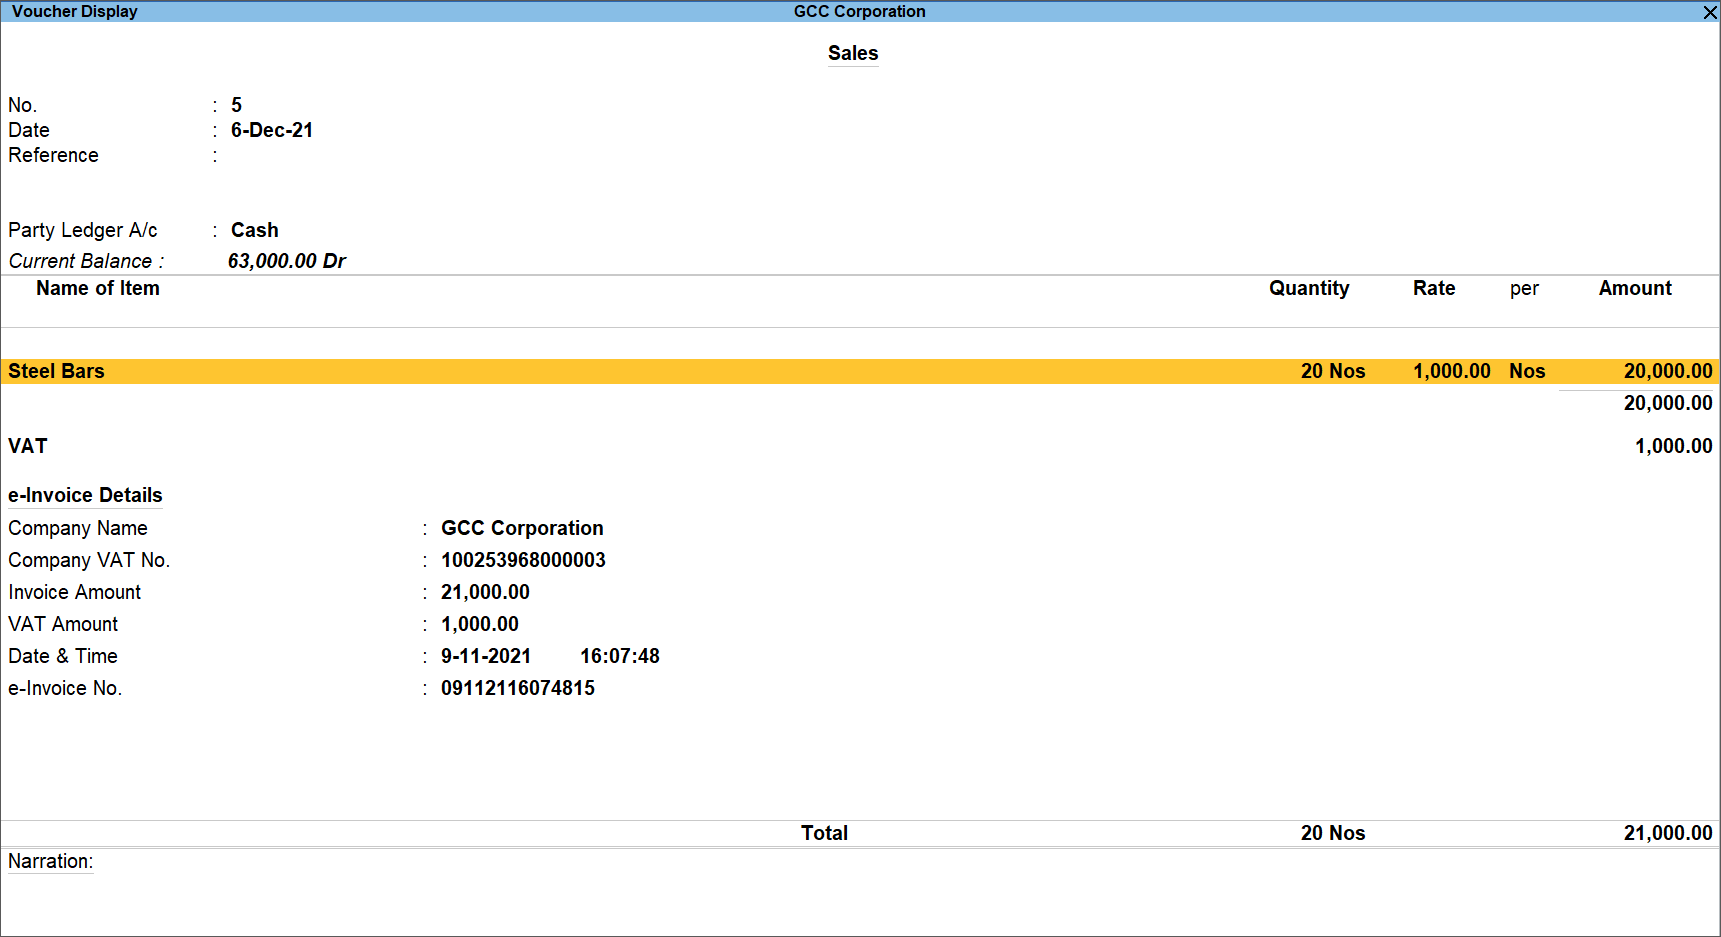
After saving the voucher, you won’t be able to edit or delete the voucher. You can view the transaction in Display mode and print it. - Print the e-Invoice
- In case you need to print your e-Invoice for each sales transaction, you can do a one-time setup in the Sales voucher type to print e-Invoice after saving the invoice.
- In the Voucher Type Alteration screen, set Print voucher after saving to Yes.
- Alternatively, you can print your invoices selectively from Day Book.
- Press Alt+G (Go To) > type or select Day Book > press Enter.
Alternatively, Gateway of Tally > Day Book > and press Enter. - Select the transaction that you want to print, and press Enter.

- Press Ctrl+P to print the transaction.
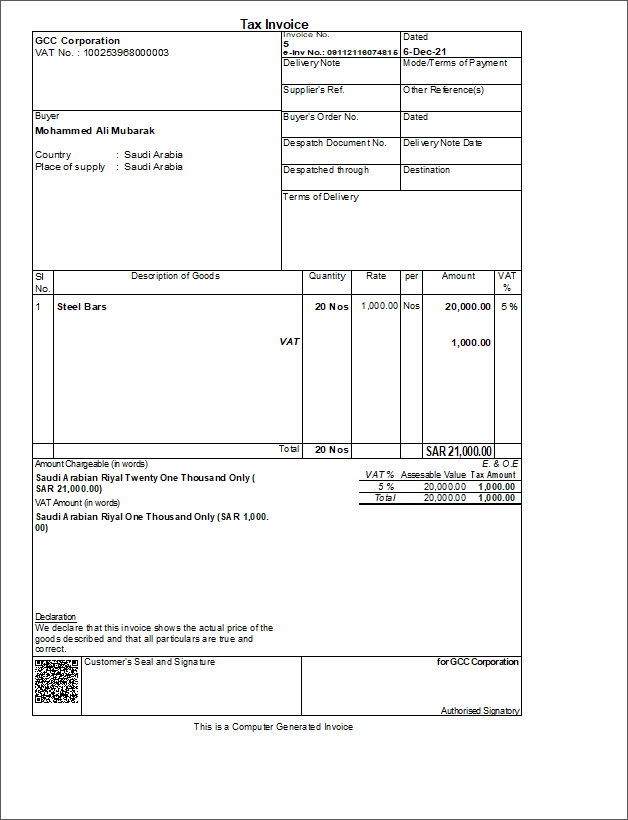
Alternatively, press Alt+P (Print) > press Enter on Current.- Press I (Preview) to ensure all details, such as the VAT No., e-Inv No., Supplier’s Ref., QR code, and others, are accurate before printing the invoice.
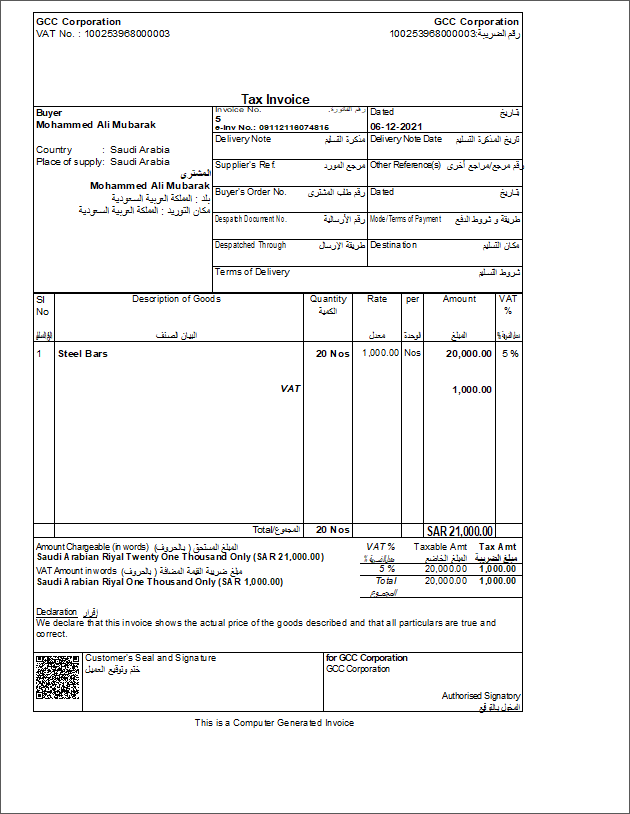
The print preview of an e-Invoice appears as shown:
- Press C (Configure) > set Print Type to Bilingual.
The Print Language option will be automatically changed to Both (Arabic/English).
The print preview of an e-Invoice in bilingual format appears as shown:
- Press P (Print) to print the e-Invoice.
Similarly, you can also generate e-Invoices for Credit Note and Debit Note and print them in bilingual format.
- Press I (Preview) to ensure all details, such as the VAT No., e-Inv No., Supplier’s Ref., QR code, and others, are accurate before printing the invoice.
- Press Alt+G (Go To) > type or select Day Book > press Enter.
- In case you need to print your e-Invoice for each sales transaction, you can do a one-time setup in the Sales voucher type to print e-Invoice after saving the invoice.
e-Invoice Reports
TallyPrime provides e-Invoice reports to view all transactions related to e-Invoicing. Details about your e-Invoice transactions can be found in the report, such as your Party VAT No., the type of transaction, e-Invoice Number, e-Invoice Date, and others. You can print the e-Invoice reports if that is required.
Altered or Tampered e-Invoice transactions: When an e-Invoice transaction is generated, TallyPrime ensures that no alteration or deletions can be made, even in the Educational mode. However, if a transaction is altered by forceful means, then the transaction is marked as Tampered.
In this section
e-Invoice Register
This report contains all e-Invoice transactions for the current month. Transactions that are not e-Invoice enabled will not be displayed here.
- Press Alt+G (Go To) > type e-Invoice Register > press Enter.
Alternatively, Gateway of Tally > Display More Reports > VAT Reports > e-Invoice Register > press Enter.
Note: Press F2 (Period) to change the period of the report, if needed. By default, TallyPrime will open the report based on the current date.
The e-Invoice Register can be seen below:
The report provides the following details of the e-Invoice transactions.
- Date: This is a voucher recording date.
- Party Name: This is the party for whom the transaction was recorded.
- Party VAT No.: This is the VAT registration number for the party.
- Transaction: This is the Voucher Type against which you have recorded e-Invoice. It could be Sales/Credit Note/Debit Note Voucher Type.
- e-Invoice Number: This is an auto-generated number based on the combination of time stamp and voucher number.
- e-Invoice Ref.: This is the voucher number.
- e-Note Inv. Ref.: This is the Original Invoice No. that you have provided when recording the Credit Note/Debit Note voucher.
- Amount: This is the total invoice amount.
- VAT Amt: This is the VAT tax amount based on the quantity and rate of the stock item.
e-Invoice Event Log
This report contains all e-Invoice transactions for the current month. Transactions that are not e-Invoice enabled will not be displayed here. This report will include various events related to e-Invoice transactions, such as Created and Tampered, along with other details.
- Press Alt+G (Go To) > type e-Invoice Event Log > press Enter.
Alternatively, Gateway of Tally > Display More Reports > VAT Reports > e-Invoice Event Log > press Enter.
Note: Press F2 (Period) to change the period of the report, if needed. By default, TallyPrime will open the report based on the current date.
The e-Invoice Event Log can be seen below:
The report provides the following details of the e-Invoice transactions.
- Time Stamp: This will consider the system date and time at which an e-Invoice is generated.
- User Name: This will consider the name of the user who recorded the e-Invoice transaction.
- Event Type: This will show the various events related to e-Invoice transactions such as Created and Tampered. You can press Alt+T (Show Tampered) to view the tampered transactions in the report.
- Transaction: This is the Voucher Type against which you have recorded e-Invoice. It could be Sales/Credit Note/Debit Note Voucher Type.
- e-Invoice Date: This is the voucher recording date.
- e-Invoice Number: This is an auto-generated number based on the combination of time stamp and voucher number.
- e-Invoice Ref.: This is the voucher number.
With these instructions, you will be able to enable e-Invoice for KSA in TallyPrime which will allow you to generate e-Invoice by recording a Sales/Credit Note/Debit Note voucher, printing the invoice in bilingual format, and viewing e-Invoice reports.
Archive e-Invoices as per ZATCA
ZATCA directs that all e-Invoices generated need to be archived in XML and PDF formats. You need to produce the archived e-Invoices when statutory officials demand. TallyPrime provides you the option to archive e-Invoices in XML and PDF formats.
View e-Invoices pending to be archived
Before archiving you can view the e-Invoices to be archived.
- Open e-Invoice Register.
- Press Alt+R (Pending Archive) to see only those e-Invoices which are not yet archived.
Press Alt+R (Show All) to view all the e-Invoices. Refer here to know more about e-Invoice Register.
Archive e-Invoices in XML and PDF formats
- Open e-Invoice Register.
- Press Alt+R (Pending Archive) to see only those e-Invoices which are not yet archived.
- Select the e-Invoices you want to archive.
- Press Space bar to select an e-Invoice.
- Press Ctrl+Space bar to select all e-Invoices.
- Press Alt+A (Archive) to archive the selected e-Invoices.
You will get a confirmation message after completing the archival at the location specified.
Was this article helpful?
That’s Great!
Thank you for your feedback
Sorry! We couldn't be helpful
Thank you for your feedback
Feedback sent
We appreciate your effort and will try to fix the article