If you don’t have a specific cheque to be printed, then you can print all the cheques at once after all the payment vouchers are recorded. Before printing the cheques make sure that the list of cheques you are printing excludes the printed cheques.
![]()
- Select the bank for printing the cheques.
- Press Alt+G (Go To) > type or select Cheque Printing and press Enter.
Alternatively, Gateway of Tally > Banking > Cheque Printing and press Enter. - Select the required bank from the List of Banks in the Select Bank screen.
- Press Alt+G (Go To) > type or select Cheque Printing and press Enter.
- Print the cheques.
- Press Ctrl+P (Print) to print.
- Set the option Print Cheque to Yes in the Cheque Printing screen and press Enter.

- Press P (Print) to cheque print.
- Press Esc. The Cheque Printing screen appears with Cheque Details for the next cheque.
You can print all the cheques at once and issue them at the time of making payment.
Bank ledger not configured for cheque printing
If the bank ledger you have selected is not configured for cheque printing, then in the Cheque Printing screen the header shows Bank not configured for Cheque Printing.
![]()
- Select the bank ledger which is not configured for cheque printing.
The Cheque Printing screen shows Bank not configured for Cheque Printing in the header. - Press Alt+B (Alter Ledger) to alter the respective Bank ledger and enable cheque printing in the Bank ledger.


Once the cheque printing is enabled, you can see the list of pending cheques for printing.
View, Search, Track Your Cheque Details from Cheque Register
You can view and search for the details of your cheques, set cheque ranges and track cheque statuses – all from the Cheque Register report. Also, find details of post-dated cheques and cheques issued in different periods as per your business needs. It also allows users to keep track of post-dated cheques.
In this section
- View and track your cheques with Cheque Register
- Update the status of the Available Cheques as Blank and print
View and track your cheques with Cheque Register
You can view the Cheque Register to see the details such as Available cheques, Unreconciled or Reconciled cheques, Blank or Cancelled cheques and so on. Along with that, you can also manage your cheques such as doing a quick search among the list of cheques or assigning a cheque range if no cheque range is assigned in the bank ledger and so on.
![]()
- Press Alt+G (Go To) > type or select Cheque Register and press Enter.
Alternatively, Gateway of Tally > Banking > Cheque Register and press Enter.

You can view the Cheque Register report and manage the cheques by altering the configurations from the various options provided by TallyPrime.
- F8 (Cheque Status): You can select the status of the cheques from the list provided and view only the list of cheques for that status.

- Ctrl+B (Basis of Values): This option helps you to enable Include Not in Range cheques so that you can also view the cheques for which the cheque range is not yet set. Apart from that you can also select Ignore completed Cheque Ranges.
- Ctrl+J (Exception Reports): You can view the Post-Dated Summary from this option.
- Alt+B (Alter Chq Book): If you have multiple chequebooks for a single bank, then you can press Alt+B to alter the chequebook.
- Alt+Q (Quick Search): This option helps you to filter and search for a cheque quickly by using the cheque number, bank name, or party name.
- Alt+R (Reconcile): For all the unreconciled cheque details you can directly go to the Bank Reconciliation screen and perform the reconciliation from this option.
- In the Bank-wise Register screen, select the bank, and press Alt+R (Reconcile) to reconcile the unreconciled cheques in that bank.
- In the Cheque Range Register screen, select the cheque range, and press Alt+R (Reconcile) to reconcile the unreconciled cheques in that range.
View cheques Bank-wise
Get a consolidated view of all your cheques from the default bank-wise screen of the Cheque Register report.
- Available Cheques – View the cheques available if you have set a cheque range while creating inyour bank ledger.
- Alternatively, set a cheque range by pressing Alt+B (Alter Chq Book) > Cheque Book Management.
- Unreconciled and Reconciled – Drill down into these columns to view the cheque details, including the related payment details.
- Blank and Cancelled – Drill down to view details of all your blank and cancelled cheques.
- Issue a blank cheque to your party from this report.
- Cancel an available cheque or a cheque that is already issued.
- Out of Period: Displays the number of cheques that do not belong to the current period chosen. The cheques may be
- Issued in the previous financial year
- Post-dated and not part of the current financial year
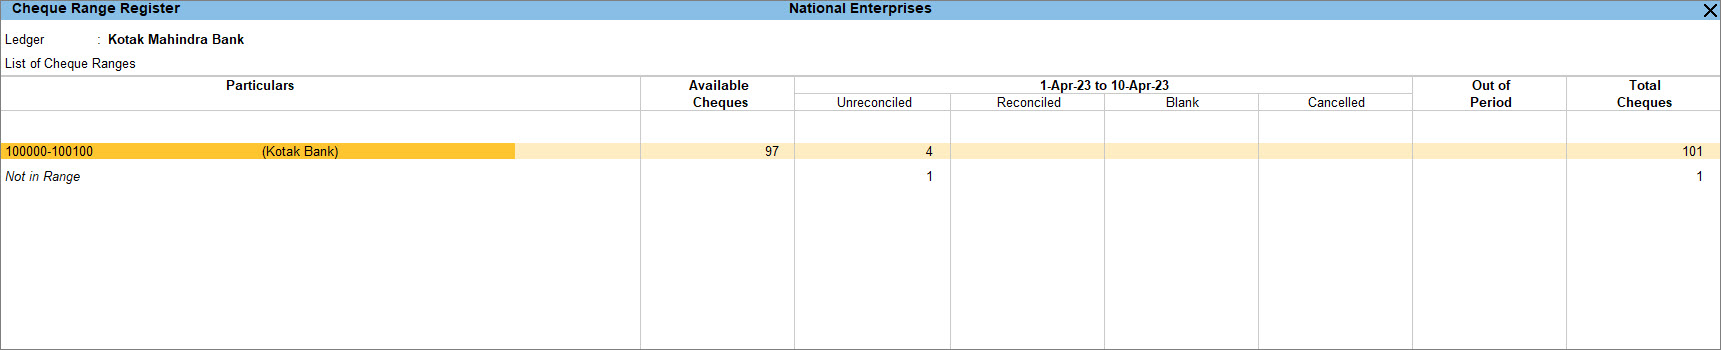
View cheques Range-wise
View cheques based on the different cheque ranges you have set, depending on the business requirements. For example, you can set cheque ranges for cheques to be issued from different departments or for cheques to be issued to different parties.
- Drill down from the Cheque Register report to view all the cheque ranges in the Cheque Range Register screen.

- F4 (Bank): You can toggle between banks from this option.
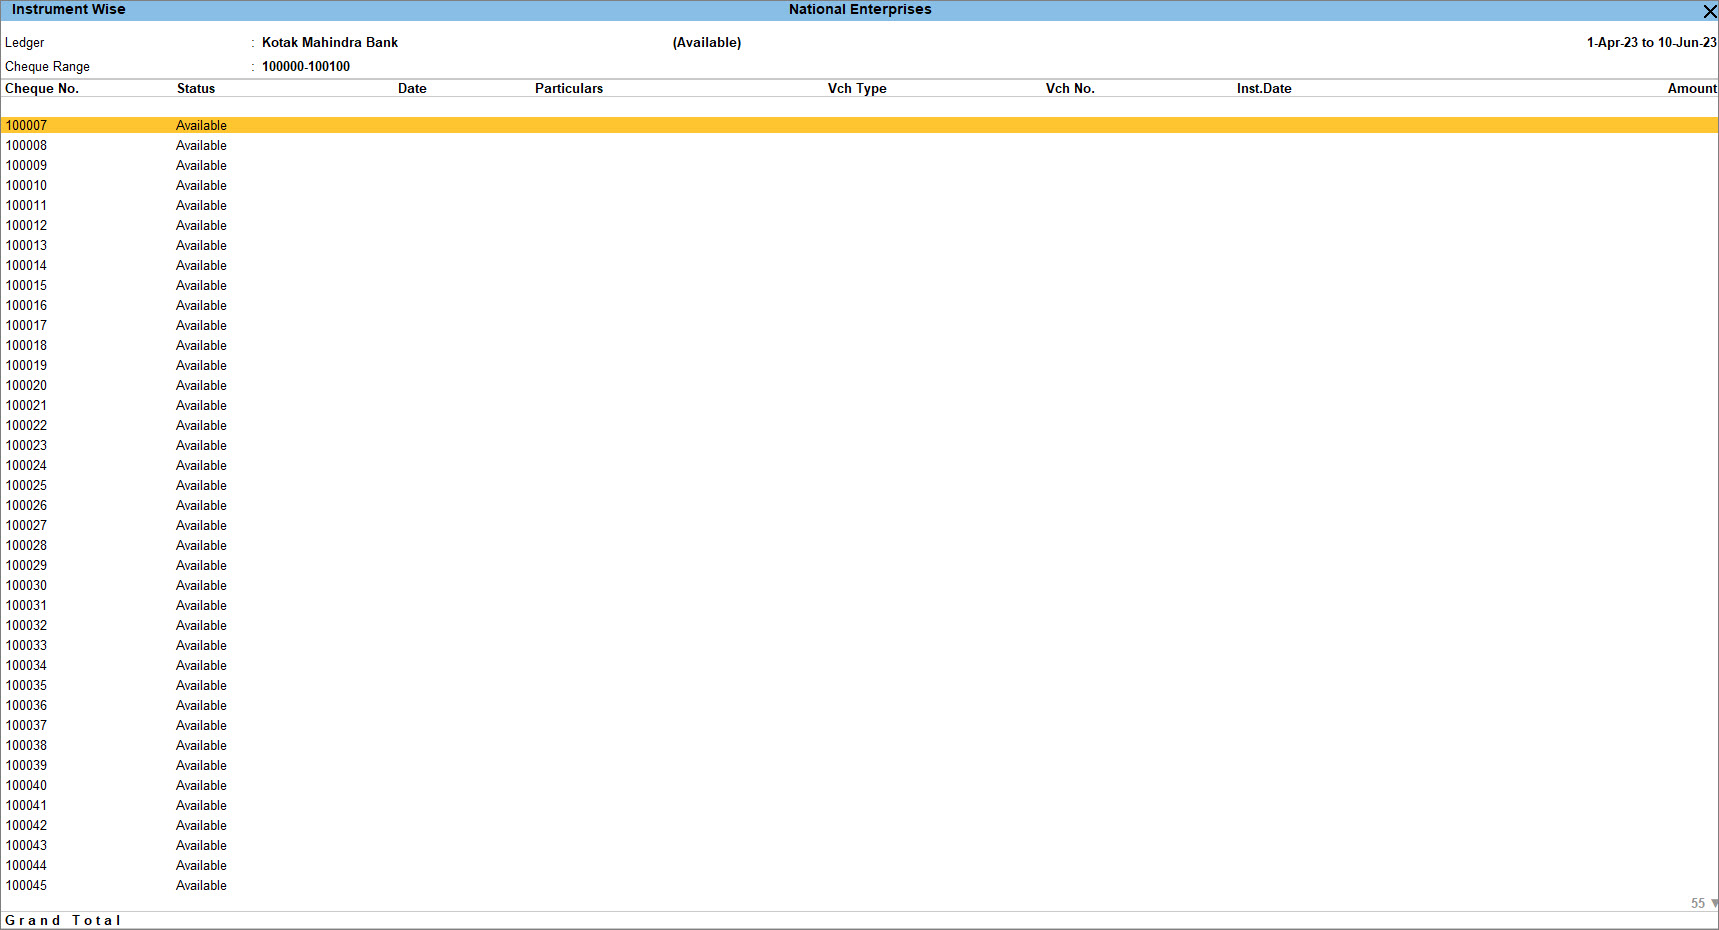
- F8 (Transactions): You can view the cheque details on the Instrument Wise screen for each cheque range.
- F4 (Cheque Range): You can toggle between different cheque ranges.
- Not in range: Drill down to view details of the cheques that are issued but not set as part of any cheque range.
Update the status of the Available Cheques as Blank and print
You can alter the status of Available cheques as Blank cheques from the Cheque Register. Once the cheque status is altered to Blank, you will be redirected to the payment voucher marked as Blank Cheque. You can record the payment voucher with all the details and leave the amount column blank. After you have recorded the payment voucher you can view the list of blank cheques in the Cheque Register.
![]()
- In the Cheque Register screen, select the total number of Available Cheques with respect to your bank ledger and drill down to the Instrument Wise screen.

- Select any cheque by pressing Spacebar.
- Press Alt+S (Alter Status) to change the status of the cheque.
- Select Blank Cheque under Cheque Status to update the status of the cheque from Available to Blank.
Ensure that you have enabled the Allow zero-valued transactions option in the Payment voucher type to update the cheque’s status to Blank.
Allow zero-valued transactions
To enable Allow zero-valued transactions,
- In the Voucher Type Alteration screen for Payment, enable Allow zero-valued transactions.
After you alter the cheque status from Available to Blank, you will be redirected to the payment voucher.
Record a Payment voucher with the Party’s name entered and the amount field blank
Record the payment voucher with the party name and leave the amount column blank.
- Record the Payment voucher.
- Select the Ledger Account from the List of Ledgers Accounts under Particulars. For example, National Traders.
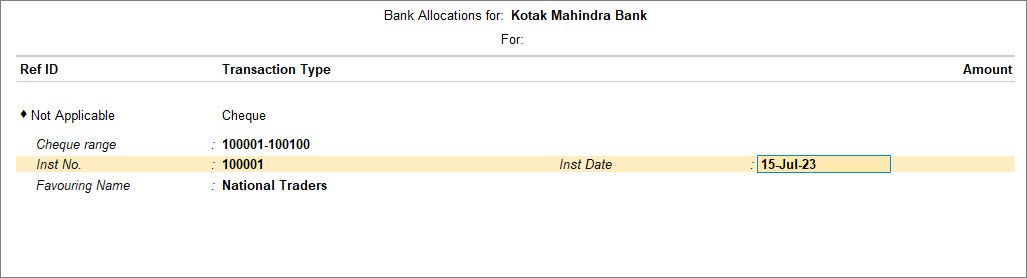
- Press Enter to skip all the fields. The Bank Allocations screen appears, with the Instruments details pre-filled, as shown below:

- Press Enter to accept all the details in the Bank Allocations screen. The Voucher Creation screen reappears.
- Press Enter or Y to accept the voucher. As always, you can press Ctrl+A to save.
The Cheque Printing sub-screen appears.
- Print the cheque.
- Press I (Preview) to view the print preview of the blank cheque, if needed.
- Press Esc twice to come back to the Instrument Wise screen. The status of the Cheque No. 100001 is now updated to Blank Cheque.
The Payment Voucher Creation screen appears with the Bank Name prefilled in the Account field and marked as Blank Cheque.
View Blank Cheque in Cheque Register
You can view the Blank Cheque under the Blank column in Cheque Register. You can drill down further to view the Instrument Wise screen and drill down to view the Accounting Voucher Alteration screen if you need to make changes to the voucher.
To view the Blank Cheque in the Cheque Register,
- Drill down from the Blank column to the Instrument Wise screen.
You can observe that the status of Cheque No. 100001 now appears as a Blank Cheque.

Was this article helpful?
That’s Great!
Thank you for your feedback
Sorry! We couldn't be helpful
Thank you for your feedback
Feedback sent
We appreciate your effort and will try to fix the article