License Activation
Once you purchase TallyPrime, you need to activate your license to enjoy the full benefits of this new and improved product. Going forward, TallyPrime will help you easily manage other licensing activities such as license surrender, reactivation, configuration, and so on.
To manage licenses, TallyPrime has the concept of site licensing. A site refers to a single license of TallyPrime, TallyPrime Developer, or TallyPrime Server that has been installed and activated. You have the flexibility to choose between two types of site licenses: single-site and multi-site.
Activate License
After purchasing TallyPrime, your first step should be to activate the license, so that you can avail the full benefits of the product. After activation, a Tally.NET account will be created, which you can use for all your licensing needs.
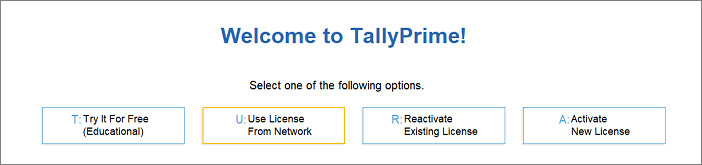
- Start TallyPrime. The Startup screen appears as shown below.

- Press A (Activate New License) in the Startup screen.
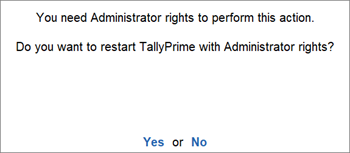
Alternatively, press F1 (Help) > Settings > License > Manage License > F6 (Activate).- If you do not have the rights to activate TallyPrime, then the following screen will appear:

- Press Enter. TallyPrime will restart with administrator rights.
- If you do not have the rights to activate TallyPrime, then the following screen will appear:
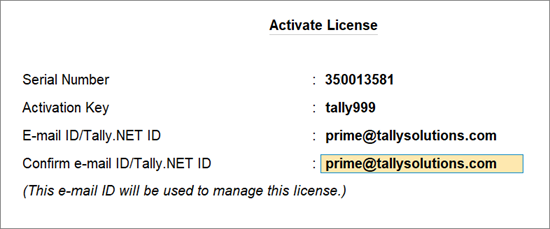
- In the Activate License screen, enter your Serial Number, Activation Key, and Administrator e-mail ID.

The e-mail ID provided here will be linked to your account, and used for all future communication and licensing activities. If you want to use an e-mail ID which is already associated with another license, then you can choose multi-site licensing.
- Press Enter to proceed. The Unlock License screen appears as shown below:

- Enter the Unlock Key sent to your e-mail ID.
If you have not received the unlock key, press F2 (Get Unlock Key).
- Press Enter to unlock your license.


Your license is now active. An activation message will appear as shown below:
Activate Multi-Site License
- Start TallyPrime.

- Press A (Activate New License) in the Startup screen.
Alternatively, press F1 (Help) > Settings > License > Manage License > F6 (Activate).- If you do not have the rights to activate TallyPrime, then the following screen will appear:

- Press Enter to restart with administrator rights.
- If you do not have the rights to activate TallyPrime, then the following screen will appear:
- Press Alt+S (Multi-Site) to view the Site License Activation screen.
- Enter the Serial Number and Activation Key.
- Enter the Account ID to which you want to add this license.
If you are not aware of the Account ID, then contact your Tally administrator. - Enter the Site ID. The Site ID should be a unique name to help you identify this license.
- Enter the e-mail ID/Tally.NET ID of the Site administrator.
The Site administrator is authorised to perform all licensing operations for this Site.
- Press Enter to save. The License screen appears as shown below:

- Click Create New Site to activate the license for a new site.
You can also choose to reactivate an existing Site. - Press Enter to view the Unlock License screen.
- Enter the Unlock Key sent to the site administrator e-mail ID.

- Press Enter to unlock your license.
A confirmation message appears after you unlock your license. You have successfully activated license for a new site in your account.
Use License from Network
When there are multiple users in the network, you need to connect your client computers to the Tally Gateway Server to access the license. Tally Gateway Server is a Windows service that is required to access a licensed version of your Tally product. You can access the license via LAN by connecting your computer to the Tally Gateway Server where the license is active.
You can configure the License by either selecting an available Tally Gateway Server, or by manually entering the details.
Select License
- Start TallyPrime. The Startup screen will appear as shown below:

- Press U (Use License from Network) in the Startup screen.
Alternatively, press F1 (Help) > Settings > License > Manage License > F4 (Use License from Network).
A message appears prompting you to connect to an available license.
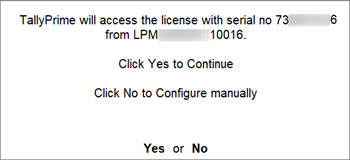
- Click Yes to connect to the license. Click Noto configure the license manually.
- If you have more than one license, then the following screen appears:

- If you have more than one license, then the following screen appears:
- Select the required license and press Enter.
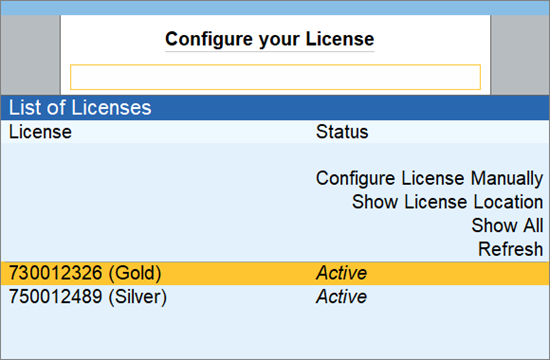
If a license is in Educational Mode, then the status License Unavailable will be displayed. Click Show All to see all the licenses, including the ones in Educational Mode.
Once you configure the license to the Tally Gateway Server, you will receive a message to restart TallyPrime and apply the changes. Press Enter. Your TallyPrime application now has access to license.
Configure Existing License
If the license that you are looking for is not available, then you can configure your license manually by entering the Tally Gateway Server and port.
- Start TallyPrime.
- Press U (Use License from Network) in the Startup screen.
Alternatively, press F1 (Help) > Settings > License > Manage License > F4 (Use License from Network).
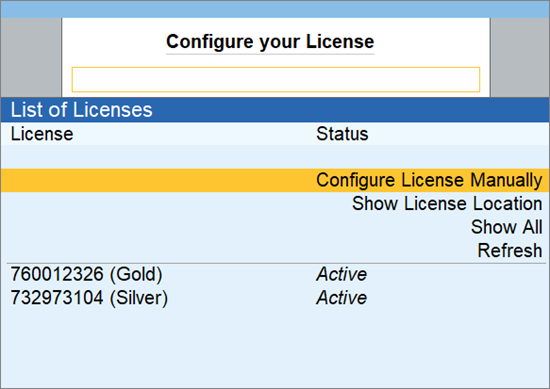
A message appears prompting you to connect to an available license. Click No to configure the license manually. The Configure your License screen appears as shown below:
- Click the Configure License Manually option. The Configure Existing License screen appears.
- Enter the Tally Gateway Server and port, as shown below:

- Press Enter. TallyPrime application connects to the Tally Gateway Server to access the License

Configure Multi-Site License
The Account/Site Administrator can configure or surrender a site belonging to an account. The configuration can be set for each site by the Account/Site administrator. Further, the Account administrator can allow or deny the Site administrator or user from making any changes to the configuration set locally.
In the Licensing and Configuration screen, you can view the details such as the Total Number of Sites, the Number of Active Sites, Site Pending for Confirmation, Number of Sites Not Used, and Number of Sites Surrendered.
Was this article helpful?
That’s Great!
Thank you for your feedback
Sorry! We couldn't be helpful
Thank you for your feedback
Feedback sent
We appreciate your effort and will try to fix the article